Tuesday, April 27, 2010

Coco-Nana Bundt


Nope it's not a late TWD post! I was about to join the TWD group a few week ago but I'm too late, the group is now closed! Ah well, at least I get to see how everyone's weekly baking turns out and then decide if I want to make it or not.

We always have some bananas lying around at my house, so I decided to make this chocolaty cake so they won't go to waste. I was a little worried because I had read a couple of reviews from other bloggers who had made it for the TWD but it turned out well! Actually, I had trouble staying away from it! It was Steph from Obsessed With Baking who chose it and you can find the recipe on her blog.

On a side note, this is what Montreal looks like today...


Gives me the urge to make some gingerbread cookies and watch Home Alone (I had to wear my boots today)!

Friday, April 23, 2010

La Maison du Macaron

I was aware of the cupcake shops in Montreal. But I had never considered that there were any macaron shops around! I don't know why it never crossed my mind before: Montreal has many French bistros, bakeries and restaurants since French is the official language and the France had colonized the area (called Nouvelle-France) a long time ago. I only recently learned about a shop called La Maison du Macaron (the site is only available in French) and was very curious to see what flavors they had available.


The little shop was crowded when I entered and I immediately noticed the large macarons decorated with raspberries. They also had one called Mac'honoré fraise et pistache that looked divine! I didn't take any pictures inside the shop because was afraid the préposé would shoo me away but you can find them on their website under Produits > Nos desserts aux fruits frais.

Some of their macarons flavors were coffee, lemon, raspberry, blueberry, fleur de sel caramel, rhum and raisin, strawberry rhubarb, baileys, litchi and tea, maple and grapefruit, pistachio. This gave me great ideas for my future macarons! I chose to try a blueberry one and a fleur de sel caramel one.


The blueberry macaron was very soft and I think it was because the weather was unusually warm! The centre tasted a lot like blueberry jam which was a bit disappointing.


I really loved the fleur de sel caramel one though. It was a bit sweeter but delicious! They also had some macarons glacés, which I'm guessing had an ice cream filling..


La Maison du Macaron
4479 De la Roche (corner Mont-Royal)
Montreal

Wednesday, April 21, 2010

Tiramisu Cups

I made a Tiramisu cake about a month ago following Dorie Greenspan's recipe in Baking: From My Home to Yours. Since everyone in my family loves Tiramisu, I had chosen to make it for my mother's birthday. The filling and coffee-flavored icing, both made with mascarpone, were delicious. I was pretty disappointed with the sponge cake though. Even if I had made it a day in advance, it turned out dry and hadn't absorbed the syrup. Overall, the cake didn't resemble the famous Italian dessert I knew.

Needless to say, I wasn't satisfied with my result and couldn't cross Tiramisu off my wishlist. Because I still had some mascarpone left in the fridge, I decided to give it another try, this time using a recipe that uses Savoiardi ladyfingers.


It didn't take me much time at all to make these Tiramisu cups. I put on The Martha Stewart Living Show yesterday morning and was watching out for Kaitlin from the Whisk Kid. I prepared the coffee liquid as the show started, cooled it, then started on the mascarpone mixture. Everything was ready to be arranged into the cups when the Whisk Kid (why do the blog names stick to us?) made her guest appearance. It was so incredible to see someone who's blog I've been following for a while now appear on television. Not only that, but also standing next to Martha Stewart and showing her how to make the fabulous Super Epic Rainbow Cake that has inspired us all! Congrats Whisk Kid!

So the Tiramisu cups were assembled in no-time, and after being refrigerated for a couple of hours, I recognized the soft, syrupy layers between the creamy mascarpone. Amazing how something so good can take so little time to make!


**********

Tiramisu Cups
Adapted from Ooh, Look... (originally from Donna Hay)
Makes 3-4 serving cups

1/2 cup strong black coffee (I used 1 tbsp Instant Espresso from Nescafe with 125ml boiling water)
1/3 coffee liqueur (Kahlua or Tia Maria)
2 tbsp brown sugar
1 cup (250g) mascarpone
1/4 cup cream
1/2 tsp vanilla extract
2 tbsp brown sugar, extra
Savoiardi ladyfinger biscuits

Place coffee, liqueur and brown sugar in a small saucepan over medium heat. Simmer for 5-6 minutes, until the sugar has dissolved (the alcohol will evaporate). Pour into a shallow bowl and refrigerate until cool.

Whisk together the mascarpone (I used 230g), cream, vanilla, and extra sugar until combined. Do not overbeat or the mixture will be too thick (I added a little cream to it cause mine was too thick).

Remove coffee liquid from refrigerator. Dip one side of the ladyfinger into the liquid, then turn it over and dip the other side. Arrange the biscuit on the base of one cup and repeat the dipping until the base of the cup is covered. (I cut the biscuits for them to fit)

Spread some of the mascarpone mixture over the biscuits. Dip and arrange a second layer of ladyfingers, then top with some more of the mascarpone mixture. Continue with the rest of the cups.

Refrigerate the tiramisu cups for at least 2 hours. Sprinkle with cocoa powder before serving. The cups keep for 3 days in the refrigerator, and its flavor improves over this time.

Monday, April 19, 2010

Lavender & Honey Ice Cream

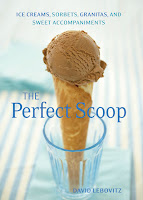
Ever since I watched the movie "It's Complicated" I've been dreaming of making lavender and honey ice cream. I wondered how lavender must taste. So I searched for the ultimate lavender and honey ice cream recipe online. But just then I received my ordered copy of "The Perfect Scoop" by David Lebovitz and he had a recipe for it! Perfect.


This is the first ice cream I made from the book and it won't be the last. I never imagined that honey and lavender would make such a delightful pairing!

**********

Lavender and Honey Ice Cream
Adapted from David Lebovitz
Makes about 1 quart (1 Liter)

1/2 cup good-flavored honey
1/4 cup dried or fresh lavender flowers
1 1/2 cups whole milk
1/4 cup sugar
Pinch of salt
1 1/2 cups heavy cream
5 large egg yolks

Heat the honey and 2 tbsp of the lavender in a small saucepan. Once warm, remove from the heat and set aside to steep at room temperature for 1 hour.

Warm the milk, sugar, and salt in a medium saucepan. Pour the cream into a large bowl and set a mesh strainer on top. Pour the lavender-infused honey into the cream through the strainer, pressing on the lavender flowers to extract as much flavor as possible, then discard the lavender and set the strainer back over the cream.

In a separate medium bowl, whisk together the egg yolks. Slowly pour the warm mixture into the egg yolks, whisking constantly, then scrape the warmed egg yolks back into the saucepan.

Stir the mixture constantly over medium heat with a heatproof spatula, scraping the bottom as you stir, until the mixture thickens and coats the spatula. Pour the custard through the strainer and stir it into the cream. Add the remaining 2 tbsp lavender flowers and stir until cool over an ice bath.

Chill the mixture overnight in the refrigerator. The next day, before churning, strain the mixture, again pressing on the lavender flowers to extract their flavor. Discard the flowers, then freeze the mixture in your ice cream maker according to the manufacturer's instructions.

Saturday, April 10, 2010

Macarons à la Framboise - Raspberry Macarons


I've been planning to make these macarons for the past week. I had made them with my boyfriend a few years ago, but they had turned out rather flat.. still delicious though! This time, I was feeling confident. I did my research: I read and reread Tartelette's "Demystifying Macarons" (a must for beginners), checked out some blogs like La cuisine Mercotte and chefNini and even found some good tutorial videos on Youtube (you'd be surprised)!

It's really different knowing all the steps in theory and actually doing them. Everything went well until the ''macaronnage'' part. I added the egg whites and almond powder to the meringue and kept stirring cause there were lumps. I think I stirred to much though, over 50 times for sure (Tartelette suggests). Then I dipped the measuring spoon into the powdered food coloring container and it flew everywhere! I can be so clumsy! As I tried to pipe out the dough onto the baking sheet, I couldn't control how much was being piped out! Either the tip I used was too big (Ateco 807) or the mixture was too liquid. So I ended up with large deformed shapes. Finally when they came out of the oven, they looked flat just like the last time I had made them! I was so discouraged at this point, I didn't even want to fill them with the raspberry jam. Half of the macarons didn't peel off the parchment paper...


I will not give up though. I want to achieve those pretty, colorful macarons! I tried my macarons this morning, after I had left them in the fridge for the night and they still tasted good. Better, actually.

**********

Macarons à la Framboise - Raspberry Macarons
Adapted from ''Demystifying Macarons'' by Tartelette

100g egg whites
50g granulated sugar
200g powdered sugar
110g ground almonds
Food coloring of your choice
Raspberry jam at room temperature

With whisk attachment in stand mixer, whip egg whites to a foam and gradually add granulated sugar until you obtain a glossy meringue (you should be able to turn the bowl upside-down).

Combine powdered sugar and ground almonds in a food processor and grind them to break sugar lumps and combine almonds with it evenly.

Add powdered sugar and ground almonds mixture to the meringue, folding them. Give quick strokes in the beginning to break the mass and then slow down. The whole process should not take more than 50 strokes.
(This is when I added the food coloring. I think I should have added it with the powdered sugar and ground almonds instead to minimize strokes.)

Fill pastry bag with plain tip and pipe small round (1.5 inches in diameter) onto parchment paper on baking sheets.

Preheat oven to 300 degrees F and let macarons sit out for around an hour to harden their shells a bit. Bake 10-12 minutes. Let cool completely before spooning some raspberry jam on one shell and sandwiching with another. (Macarons taste best after being placed in the refrigerator for a few hours.)

Tuesday, April 6, 2010

Allergen-Free Chocolate Cupcakes


I want to like Martha. I really do. I mean I do own her "Martha Stewart Cupcakes" and "Martha Stewart Cookies" books. But it's really hard to like her when it's 10pm and the swiss meringue buttercream is curdled. It even says so in the book that the mixture might appear to curdle after adding the butter and to keep on beating. So I kept beating and what was I left with? Some sort of mixture that tastes like butter. How will I frost the cupcakes with this? So I sort of turned the swiss meringue buttercream into a buttercream simply by adding sifted powdered sugar until I got the consistency I wanted. And it tasted better too! I don't know if you would call it a buttercream though because it had egg whites in it too.. But I really want to get that swiss meringue buttercream right! It looks really nice on the pictures, I would try it again another time. Has anyone ever tried it and succeeded? I'm sure I'm doing something wrong!

Anyways so I made these cupcakes for the daycare my mom is working at and anything brought there for the children must not contain any nuts. So I figured I can't go wrong with this recipe! I had my doubts with the cupcakes when I ended up with a very liquid batter and they did turn out a bit dense, but they tasted good. I don't know if I would remake them again though, I like my cupcakes moist and cakey!

**********

Allergen-Free Chocolate Cupcakes
Adapted from Martha Stewart's Cupcakes
Makes 12

1 1/2 cups cake flour
3/4 cups granulated sugar
1/4 cup unsweetened cocoa powder
1 teaspoon baking soda
1/2 teaspoon salt
1/4 cup plus 1 tbsp vegetable oil
1 tbsp distilled white vinegar
1 tsp pure vanilla extract
1 1/4 cups water

Preheat oven to 350 degrees and line a muffin tin with paper liners. Sift together cake flour, granulated sugar, cocoa, baking soda and salt.

With electric mixer on medium-high speed, mix together oil, vinegar, vanilla and water until well combined. Add flour mixture and mix until smooth (batter will be very thin).

Divide batter evenly among lined cups, filling each 3/4 full. Bake, rotating tin halfway through, until a toothpick inserted into centers comes out clean, about 20 minutes. Place cupcakes onto wire rack until cooled completely.

Swiss Meringue Buttercream
Adapted from Martha Stewart's Cupcakes
Makes about 5 cups

5 large egg whites
1 cup plus 2 tbsp sugar
pinch salt
4 sticks unsalted butter, softened
1 1/2 teaspoons pure vanilla extract

Combine egg whites, sugar and salt in heatproof bowl of a standing mixer set over a pan of simmering water. Whisk constantly by hand until mixture is warm to the touch and sugar has dissolved.

Attach bowl to mixer fitted with whisk attachment. Starting on low and slowly increasing to medium-high speed, whisk until stiff (but not dry) peaks form. Continue mixing until the mixture is fluffy and glossy and completely cool, about 10 minutes.

With mixer on medium-low speed, add the butter a few tablespoons at a time, mixing well after each addition. Once all butter had been added, whisk in vanilla (I used lemon extract). Switch to paddle attachment and continue beating on low speed until all air bubbles are eliminated, about 2 minutes. This is when I added the sifted powdered sugar. Add gel-paste food color, a drop at a time (I use toothpick to add a dab at a time).

Thursday, April 1, 2010

Bunny Sugar Cookies

This time of year is just hectic. All the final projects and assignments are due, finals are coming up so it's time to start panicking and hope I can still remember things I had studied for before the midterms. But then there's Easter with all the possible good things to make, like sugar cookies.


I've been wanting to make these forever. These websites are very helpful. They have step-by-step instructions and tips on how to decorate with runny royal icing:


It didn't look so complicated: bake cookies, make icing, pipe onto cookies. The baking was pretty simple. I used the sugar recipe featured in Canadian Living and made the runny royal icing found on the Cake Journal website.

Maybe it's because it was my first time using runny royal icing, but I had a bit of trouble making neat outlines of my cookies. It doesn't really matter though because it barely shows when you fill them in. At the end of the night I had purple icing on my pants, arms and on the whole table. It's pretty messy I tell you, but cleaning it up was delicious!

I had to let the first coat (purple icing) dry for 24 hours before making the little details in white. It skipped my mind to keep some icing aside before adding purple so I can make the tail, ears and nose in white and had to remake a mini batch the following day. It didn't take that long though because I knew what to expect!

These cookies were yummy but a little time-consuming. Call me lazy but next time I would divide the tasks like this:

Day 1: Bake cookies
Day 2: 1rst coat of icing
Day 3: 2nd coat of icing

**********

Vanilla Sugar Cookies
Adapted from Holiday Baking by Canadian Living
Makes about 30 cookies

3/4 cup butter, softened
1 cup granulated sugar
1 egg
1 tsp vanilla
2 1/2 cups all-purpose flour
1/2 tsp baking powder
pinch salt

In a large bowl, beat butter with granulated sugar until fluffy; beat in egg and vanilla.
In separate bowl, whisk together flour, baking powder and salt; stir into butter mixture in 2 additions to make smooth dough.

Divide dough in half and flatten into discs; wrap each and refrigerate until firm, about 1 hour. (I didn't do this part.)

On floured surface, roll out each disc into 1/4-inch thickness. With floured cookie cutters, cut out cookies as desired. Arrange, 1 inch apart, on 2 baking sheets with parchment paper or grease. Bake in top and bottom thirds of 350 degree oven, rotating and switching pans halfway through, until light golden on bottom and edges, 10 to 12 minutes. (Mine took about 16 minutes because they were thick.) Transfer to racks and let cool completely before decorating.

Runny Royal Icing
Adapted from Cake Journal

2 eggs whites
2 lbs sifted icing sugar (not all will be used)
1 tsp lemon

Combine egg whites and lemon juice in a bowl. Add some icing sugar and start the mixer.
Keep adding sugar until the icing looks like whipped cream and makes soft peaks. Then add 2 tsp at a time (because the icing will get stiffer faster) until the icing makes stiff peaks. To make it runny, add a few drops of water and stir. Keep alternating between adding drops of water and stirring until it gets a thin. A trick I read was that the perfect consistency is when you can run a spoon in it and then the icing surface becomes flat again between 5-10 seconds. Cover bowl of unused icing with a damp cloth, it tends to dry out fast.