Showing posts with label travel. Show all posts

Monday, January 31, 2011

Marshmallows and Ski


I really regret not enjoying winter as much as I should. Instead of hanging out indoors, watching movies and going for coffee, I should be out there skating, snowshoeing and skiing! Quebec is the perfect place for outdoor sports!

Mont St-Anne, Québec

This is the second year we go on the ski trip organized by Concordia University. Last year was my first time skiing, so I had to take beginner lessons. This year was a bit easier, I remembered the pointe de pizza and that I had to do big S's down the slope, not go down in a straight line... But the reason we enjoy this trip is because we are with friends, hang out in our chalets, have delicious dinners and all get together at night.


If you've never made marshmallows before, this is the best time! Not only can you enjoy them in a warm cup of hot chocolate, you can roast them over a fire or even make S'mores! Make the traditional white ones (vanilla) but also try making some yummy chocolate (I highly suggest) or raspberry ones! Whatever you do, they will taste 10X better than store-bought marshmallows and everyone will be like: "You can make marshmallows? How?"

Here's the recipe by Dorie Greenspan from Baking: From My Home to Yours. Try it out, it's not as hard as it seems!


Monday, January 17, 2011

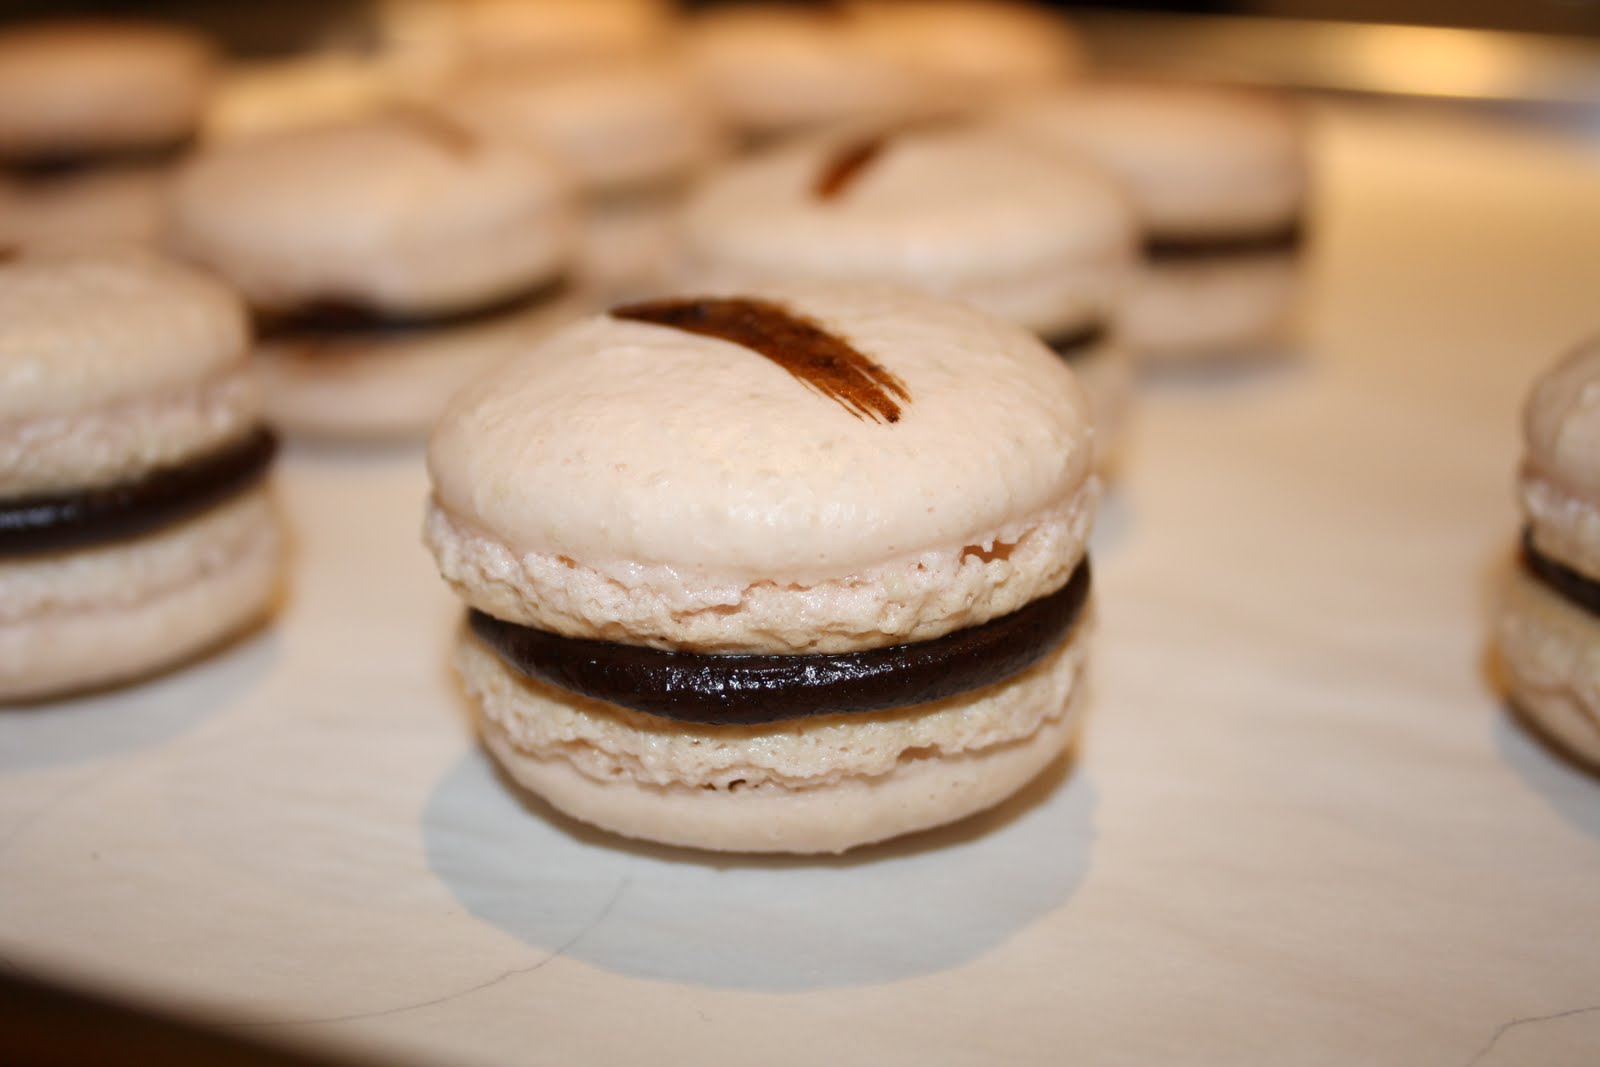
Macarons au café - Coffee Macarons


Last year I had visited a macaron shop in the downtown area of Montreal and wrote a post about it! The owners of that shop have written a book with all the recipes of the macarons they sell there and guess what? I got it for Christmas! It is such a beautiful book! I will attempt to make my favorite macaron one day, caramel fleur de sel.


This week, I made my first macaron from that book, Macarons au café (or Coffee Macarons) following the Italian meringue method. The recipes are planned out for you, dividing the tasks to make each macaron in days. For these, Jour 1 consisted of making the chocolate-espresso ganache and Jour 2 consisted of making the shells and assembling them. They turned out a success, even if I used dark chocolate instead of milk for the ganache! I only think that I should have ground the almond powder more because my macaron shells turned out looking a bit grainy. I'll be doing that next time one day or two before and letting it dry. I can't wait to try making more! Here is their in-store catalogue!


Saturday, January 15, 2011

Sundae Cupcakes


I'm finally posting the cupcakes I made for Cupcake Camp 2010 a few months ago. Aren't they pretty? I chose to make sundae cupcakes since I love making ice cream so much! I'm really looking forward to participate in the competition next year!

I used the devil's food cake recipe from David Lebovitz and the vanilla buttercream recipe below for the cupcakes. I made the Classic Hot Fudge from The Perfect Scoop and drizzled it on top of the frosted cupcakes after it had cooled a bit. Decorate with sprinkles and maraschino cherries!

**********

Sundae Cupcakes
Makes about 48 frosted cupcakes

Chocolate Cupcakes
Adapted from Annie's Eats, originally from David Lebovitz

18 tbsp unsweetened cocoa powder
3 cups cake flour
1 tsp salt
2 tsp baking soda
1/2 tsp baking powder
16 tbsp unsalted butter, at room temperature
3 cups granulated sugar
4 large eggs, at room temperature
1 cup strong coffee (or water)
1 cup whole or low-fat milk

Preheat oven to 350 degrees F. Line 4 cupcake pans with papers liners. In a medium bowl, sift together the cocoa powder, cake flour, salt, baking soda and baking powder. In the bowl of a standing mixer fitted with paddle attachment, cream the butter and sugar on medium-high speed until light and fluffy, about 5 minutes. Mix in the eggs one at a time, scraping down the sides of the bowl between additions.

In a large measuring cup, combine the coffee and milk. Add half of the dry ingredients to the mixer and mix on low speed just until incorporated. Stir in the coffee-milk mixture and mix until combined. Add in the remaining dry ingredients, again mixing until just incorporated. Divide the batter evenly between the cupcake liners, filling the cups not more than 3/4 full. Bake for 20 minutes, or until a toothpick inserted in the center comes out clean. Transfer to wire rack to cool completely.

Vanilla Buttercream
Adapted from Milk and Honey Cafe

1-1/2 cups (3 sticks) unsalted butter, softened
3-4 cups confectioners' sugar, sifted
1 tsp vanilla extract
2 tbsp heavy cream

In a stand mixer fitted with a whisk attachment, beat the butter at medium-high speed until smooth, for about 20 seconds. Add half the confectioners' sugar, beat at medium-low speed until most of the sugar is moistened, about 45 seconds. Scrape down the bowl and beat at medium-high speed until mixture is fully combined, about 15 seconds. Add the rest of the confectioners' sugar and mix again. Scrape the bowl, add the vanilla extract and heavy cream, and beat at medium-high speed until incorporated, about 10 seconds. Then increase the speed to medium-high and beat until light and fluffy, about 5 minutes, scraping down the bowl once or twice. Add more confectioners' sugar if you find your frosting isn't thick enough, or more heavy cream if you find it too thick.

Tuesday, November 30, 2010

Cupcake Camp 2010

My first foodie event!! I really didn't expect there to be that many people at Cupcake Camp 2010! There was a huge lineup, starting outside, continuing down the halls of the Queen Elizabeth Hotel and leading upstairs! I even bumped into a few friends there! I have never seen that many people go crazy over cupcakes... And the event turned out to be a huge success according to their website. Isn't that amazing? A completely volunteer run event that raised over 34,500$, shared 25,000 cupcakes with 2,500 people for the Kids Help Phone and La Tablée des Chefs!!


Two chefs from the Food Network: Nadia G. from Bitchin' Kitchen and Ricardo Larrivée from Ricardo and Friends. They were both really nice and let me take pictures!


There was also a cupcake competition. Take a look at these cupcakes! Amazing!


These are some of the cupcakes I got to take home. This one my friend made (yes, she donated over 200 cupcakes!!) and it was one of my favorite: white velvet with pomegranate filling and white chocolate frosting if I remember correctly!


This one I didn't get to try. I only had the fondant jalapeño and my sister decide to eat it cause she thought it was chocolate and got a nice surprise! Apparently it was quite hot!


I can't wait for next year's event! My friend and I really want to participate in the competition but we're going to have to work hard to come up with something creative. I'll make sure I post the cupcakes I donated soon!

Monday, August 16, 2010

Nougat

I can hardly believe it's been over a month since I last posted! It feels like forever! I haven't been on the computer much this summer, I've wanted to enjoy the sunny and hot weather as much as possible before I go back to my stressful life as a student. I've been working a lot more too to finance my future vacations (to hopefully take place next summer) and to pay off my 4-night trip to Las Vegas! It was wonderful but I doubt I'd be visiting again soon. I'm not the gambling type (I'd rather spend the money I'd be risking on a pair of jeans...) but still enjoyed the 45-degree weather and the beautiful pools at the Caesar's Palace! The strip has an amazing view at night too with all the lights and the Eiffel Tower from the Paris Hotel. Anyway I really think that a trip to Las Vegas is a must, at least once in your lifetime!


So now let's turn to baking, or freezing in my case. I've been making so many ice creams lately that I think I'll put that on hold, at least for a little while. Too much of one thing is not good, right? So what do I replace my usual custard-making and churning with? Something chewy, nutty and sweet... Nougat!


Nougat is one of those things I always buy just a piece or two of, just to satisfy my nougat-craving. I never end up buying a huge bag of them and that's exactly how much we were left with after making this recipe! A whole lotta nougat! Thank god most of them stayed with my boyfriend at his house :)

Anyways this recipe is not very hard to make but you have to keep an eye on the honey and corn syrup mixtures while they are heating... and this requires the use of 2 thermometers!

**********

Nougat
Adapted from The Fundamental Techniques of Classic Pastry Arts
Makes 30 to 45 squares

280g almonds
160g hazelnuts
160g walnuts
40g pistachios
2 large egg whites, at room temperature
280g honey
240g light corn syrup
600g sugar
cornstarch for dusting

Preheat oven to 220 degrees F and line a baking sheet with parchment paper. Combine the almonds, hazelnuts, walnuts and pistachios on the baking sheet and toast them in the oven for about 15 minutes, turning frequently. Keep the nuts warm while preparing the nougat base (keep them in the oven with the oven turned off and the door slightly opened).

Place egg whites in a mixer bowl fitted with whip attachment. Combine honey with 40g of the corn syrup in a small saucepan over low heat and bring to a boil (candy thermometer 1).

While waiting for the honey mixture to boil, combine remaining corn syrup, sugar and 75ml cold water in a medium saucepan over low heat and bring to a boil (candy thermometer 2).

When honey mixture comes to a boil, start whipping egg whites. When the honey mixture reaches 130 degrees C (266 degrees F), pour it over the egg whites (don't stop beating). Try to pour it on the side of the bowl and not directly on top of the beaters or else this can form hardened candy on the beaters.

Continue to whip until sugar mixture has reached 139 degrees C (282 degrees F) and pour it over the egg whites (keep beating).

When the meringue begins to stiffen, switch the whip attachment for the paddle attachment. Continue to beat on low and add the nuts, mixing just to blend.

Place a silicone mat on a large pan. Lightly dust it with cornstarch and pour the hot nougat on top. Dust the top of the nougat with cornstarch and place another silicone mat on top of it. Roll the nougat to 1.3 cm (1/2-inch) thick with rolling pin.

Allow to cool for a couple of hours and cut into 2.5 cm (1-inch) squares. Use a brush if you want to dust off the excess cornstarch and enjoy!

Thursday, July 1, 2010

Baking Bagels


During the school semester when I had to keep up with my readings, assignments and constantly study for tests, I longed for summer holidays. I even dropped the summer class I had intended to take to have a stress-free vacation and to be able to enjoy the good weather.

But I've been having a little bit of trouble occupying my time these past few weeks. I started a puzzle which ended up being too long and lost patience pretty quickly. I never miss the opportunity to tan in my backyard when the weather is sunny and warm, even if the view isn't comparable to the one we had last year on our trip to Greece.


This time 2009, a couple of friends and I were exploring the beautiful island of Mykonos located in the Aegan Sea. Mykonos is known as the party island of Greece so its streets are filled with tourists at any time of the day. Ahh Mykonos..


So when not working or playing that ridiculously addictive game Zuma, I'm in the kitchen making yet another ice cream from The Perfect Scoop. This time, I wanted to try something different. I was craving something simple, something savory. I have a huge sweet tooth but I can never resist bread and cheese. I can go on eating that for days!

I've never ever baked anything with yeast before. Sure I've helped my boyfriend, V, bake all sorts of breads (his ciabatta and sour dough are my favorite) and we have made some really good bagels. He uses The Bread Baker's Apprentice like I use my copy of The Perfect Scoop! So when I got that sudden urge to bake bagels, I was going straight for that recipe, except I didn't have any bread flour! Then I rememebered that lovely post Elissa had made on 17 And Baking. There was no bread flour used and her homemade bagels looked perfect!


My bagels might not have turned out as perfect as Elissa's (V told me to knead more to get a smoothe dough... they look a little deformed...), but they sure were delicious!

Friday, April 23, 2010

La Maison du Macaron

I was aware of the cupcake shops in Montreal. But I had never considered that there were any macaron shops around! I don't know why it never crossed my mind before: Montreal has many French bistros, bakeries and restaurants since French is the official language and the France had colonized the area (called Nouvelle-France) a long time ago. I only recently learned about a shop called La Maison du Macaron (the site is only available in French) and was very curious to see what flavors they had available.


The little shop was crowded when I entered and I immediately noticed the large macarons decorated with raspberries. They also had one called Mac'honoré fraise et pistache that looked divine! I didn't take any pictures inside the shop because was afraid the préposé would shoo me away but you can find them on their website under Produits > Nos desserts aux fruits frais.

Some of their macarons flavors were coffee, lemon, raspberry, blueberry, fleur de sel caramel, rhum and raisin, strawberry rhubarb, baileys, litchi and tea, maple and grapefruit, pistachio. This gave me great ideas for my future macarons! I chose to try a blueberry one and a fleur de sel caramel one.


The blueberry macaron was very soft and I think it was because the weather was unusually warm! The centre tasted a lot like blueberry jam which was a bit disappointing.


I really loved the fleur de sel caramel one though. It was a bit sweeter but delicious! They also had some macarons glacés, which I'm guessing had an ice cream filling..


La Maison du Macaron
4479 De la Roche (corner Mont-Royal)
Montreal