Saturday, August 28, 2010

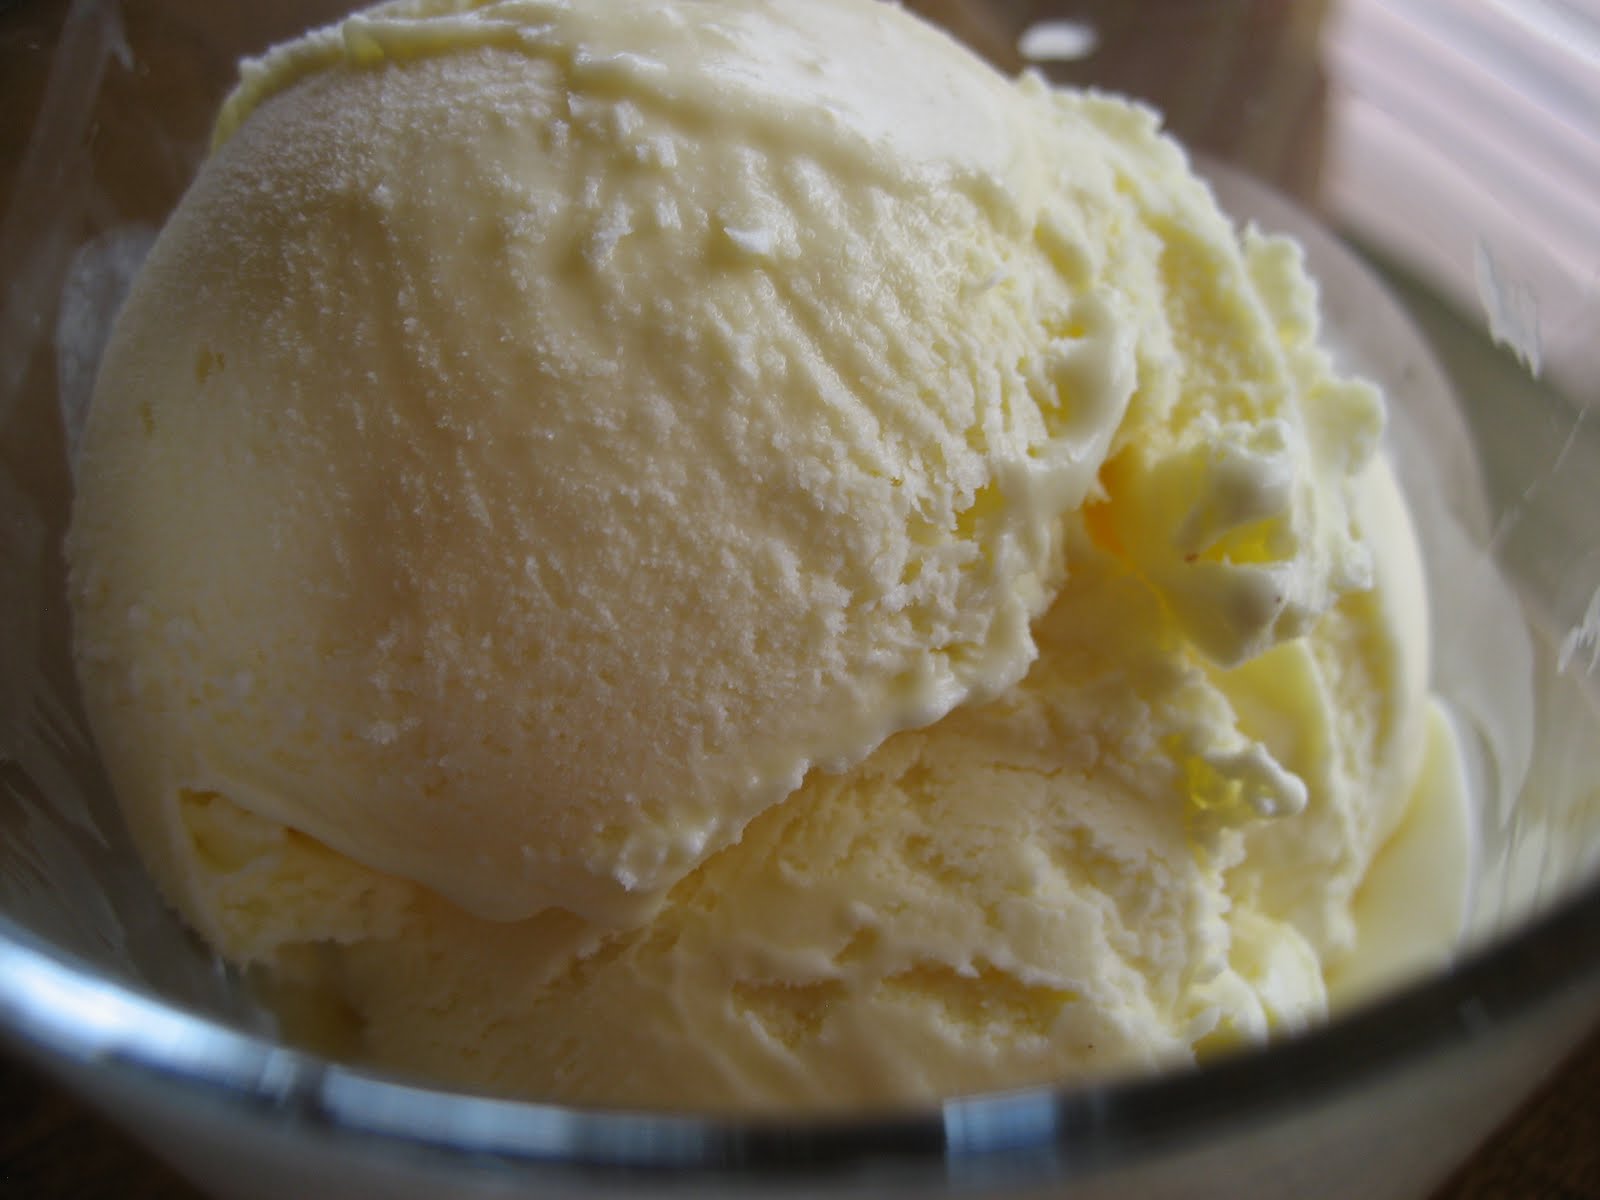
Mastic Ice Cream

The only producer of mastic, also called masticha, is the island Chios in Greece, but it is used in many other countries (Egypt, Turkey, Lebanon, Morocco) for sweets and pastries as well as liqueurs and chewing gums.


I tried mastic ice cream for the first time last summer on my trip to Greece. There's this really good ice cream shop called To Pagoto in Glyfada (Athens) where they have very unique flavors, like Tsoureki, a Greek Easter bread! And now, since I've been making quite a lot of ice cream and stumbled upon some mastic resin crystals (ok... really I looked for them in every gourmet market), I simply had to give it a try!

But there was no mastic ice cream in The Perfect Scoop! No problem: I just used David Lebovitz's method of making vanilla bean ice cream (French-Style), left out the vanilla bean and substituted it for ground mastic! I found that Kevin from Closet Cooking had also made this ice cream and decided to use some vanilla sugar just like he did.


The result was a creamy ice cream, with a slightly gummy texture (which I liked) and a hint of mastic flavor. I liked that the mastic taste wasn't too overpowering and would definitely place this ice cream in my top 5. I did have a hard time getting all the mastic off my pot, mortar and pestle and spoons though... I think I could have prevented this by grinding the mastic with some of the sugar...

**********

Mastic Ice Cream
Adapted and modified David Lebovitz's
Vanilla Bean Ice Cream
Makes about 1/2 Liter (1/2 Quart)

1/2 cup whole milk
3/8 cup (75 g) vanilla sugar

1 cup heavy cream

pinch of salt

1/2 tsp mastic resin crystals

3 large egg yolks

Use a mortar and pestle to grind the mastic resin crystals. Warm the milk, sugar, ½ cup of the cream and salt in a medium saucepan. Add the ground mastic to the warm milk and stir. Remove from the heat and cover for about 30 minutes. There might be pieces of mastic that will have formed. (No worries, we will strain them out later!)

Pour the remaining ½ cup cream in a bowl and set a mesh strainer on top. In another medium bowl, whisk the egg yolks and slowly pour in the warm mixture (to temper eggs), whisking constantly. Scrape the warmed egg yolks back into the saucepan and constantly stir the mixture over low heat with a spatula, until mixture thickens and coats the spatula. Pour the custard through the strainer and into the cream. Stir until cool over an ice bath.

Chill the mixture thoroughly (even overnight) in the refrigerator. Freeze the mixture in an ice cream maker according to manufacturer’s instructions.

Thursday, August 26, 2010

Spritz Cookies


The only thing that stopped me making these cookies is the fact that I didn't own a cookie press. I checked out a few places for it and finally found a good deal at Déco Découverte.

These cookies don't need any planning ahead because the ingredients can be found in any kitchen: flour, butter, sugar, eggs, milk, vanilla extract and baking powder. The Wilton recipe asks for a bit of almond extract also, but you can leave that out if you want.


Even though they look cute and easy to make, they are not! Maybe it's just me not being able to use to cookie press properly, but I had a really hard time getting the cookies onto the parchment paper or Silpat! I would press the little handle and the cookie would form but it would stay stuck to the cookie press!

I know I'm complaining and everything, but they were worth it. I would make them again, even after all that hassle! I would probably dip some into chocolate or decorate them with candied cherries next time.

**********

Spritz Cookies
Adapted from Wilton
Makes about 6 dozen cookies

3 1/2 cups all purpose flour
1 tsp baking powder
1 1/2 cups butter, softened
1 cup granulated sugar
1 egg
2 tbsp milk
1 tsp pure vanilla extract
1/2 tsp almond extract

Preheat oven to 350 degrees F. Combine flour and baking powder in a bowl. In another large bowl, beat butter and sugar until light and fluffy. Add the egg, milk, vanilla and almond extract. Beat well (do not chill dough) and fill cookie press with the dough and desired disk. Press cookies onto a ungreased cookie sheet.

Bake 10-12 minutes or until edges are light golden brown. Cool 2 minutes on cookie sheet placed on a rack then remove from sheet and cool completely.

Wednesday, August 25, 2010

Raspberry Swirl Cheesecakes


My taste in food has changed a lot since I was little. My favorite cheese used to be Kraft Cheese but now I can't get enough of Brie, Jarlsberg and Kefalogaviera!

Cheesecake would be the last thing I would have chosen to eat. I remember I didn't appreciate its thickness and creaminess and would only eat the glazed strawberries on the top of the cake. Recently I started liking it though. These cheesecake cupcakes turned out cute and were pretty easy to make. I had halved the recipe because I didn't want to be stuck with too many of them but surprisingly, they disappeared very fast!


**********

Raspberry Swirl Cheesecakes
Adapted from Cupcakes by Martha Stewart
Makes 32 cupcakes

1 1/2 cups finely ground graham crackers
3 tbsp unsalted butter, melted
1 1/2 cups + 5 tbsp sugar
6 ounces fresh raspberries
2 lbs cream cheese, at room temperature
pinch of salt
1 tsp vanilla extract
4 large eggs, at room temperature

Preheat oven to 325 degrees F. Line muffin tins with paper liners. Stir together ground graham crackers, butter and 3 tbsp sugar. Press 1 tbsp of crust mixture firmly into the bottom of each lined cup. Bake for 5 minutes until set and place tins on a wire rack to cool.

Process raspberries in a food processor until smooth and strain the mixture into a small bowl to remove seeds. Whisk in 2 tbsp sugar.

Beat cream cheese until fluffy with a mixer on medium-high speed (scrape down sides of bowl if needed). With mixer on low speed, add remaining 1 1/2 cups of sugar gradually. Add eggs one at a time, beating until just combined after each.

Spoon 3 tbsp filling over crust in each cup. Dollop 1/2 tsp raspberry puree in a few dots on each. Swirl sauce into filling with a toothpick in each cup. Place each tin into a roasting pan and pour enough hot water into the pan to come to three-quarters of the way up sides of cups.

Bake, rotating pans halfway through, until filling is set, between 22-24 minutes. Remove tins from water bath and transfer to wire racks to cool completely. Refrigerate (in tins) for at least 4 hours and remove from tins just before serving.

Monday, August 16, 2010

Nougat

I can hardly believe it's been over a month since I last posted! It feels like forever! I haven't been on the computer much this summer, I've wanted to enjoy the sunny and hot weather as much as possible before I go back to my stressful life as a student. I've been working a lot more too to finance my future vacations (to hopefully take place next summer) and to pay off my 4-night trip to Las Vegas! It was wonderful but I doubt I'd be visiting again soon. I'm not the gambling type (I'd rather spend the money I'd be risking on a pair of jeans...) but still enjoyed the 45-degree weather and the beautiful pools at the Caesar's Palace! The strip has an amazing view at night too with all the lights and the Eiffel Tower from the Paris Hotel. Anyway I really think that a trip to Las Vegas is a must, at least once in your lifetime!


So now let's turn to baking, or freezing in my case. I've been making so many ice creams lately that I think I'll put that on hold, at least for a little while. Too much of one thing is not good, right? So what do I replace my usual custard-making and churning with? Something chewy, nutty and sweet... Nougat!


Nougat is one of those things I always buy just a piece or two of, just to satisfy my nougat-craving. I never end up buying a huge bag of them and that's exactly how much we were left with after making this recipe! A whole lotta nougat! Thank god most of them stayed with my boyfriend at his house :)

Anyways this recipe is not very hard to make but you have to keep an eye on the honey and corn syrup mixtures while they are heating... and this requires the use of 2 thermometers!

**********

Nougat
Adapted from The Fundamental Techniques of Classic Pastry Arts
Makes 30 to 45 squares

280g almonds
160g hazelnuts
160g walnuts
40g pistachios
2 large egg whites, at room temperature
280g honey
240g light corn syrup
600g sugar
cornstarch for dusting

Preheat oven to 220 degrees F and line a baking sheet with parchment paper. Combine the almonds, hazelnuts, walnuts and pistachios on the baking sheet and toast them in the oven for about 15 minutes, turning frequently. Keep the nuts warm while preparing the nougat base (keep them in the oven with the oven turned off and the door slightly opened).

Place egg whites in a mixer bowl fitted with whip attachment. Combine honey with 40g of the corn syrup in a small saucepan over low heat and bring to a boil (candy thermometer 1).

While waiting for the honey mixture to boil, combine remaining corn syrup, sugar and 75ml cold water in a medium saucepan over low heat and bring to a boil (candy thermometer 2).

When honey mixture comes to a boil, start whipping egg whites. When the honey mixture reaches 130 degrees C (266 degrees F), pour it over the egg whites (don't stop beating). Try to pour it on the side of the bowl and not directly on top of the beaters or else this can form hardened candy on the beaters.

Continue to whip until sugar mixture has reached 139 degrees C (282 degrees F) and pour it over the egg whites (keep beating).

When the meringue begins to stiffen, switch the whip attachment for the paddle attachment. Continue to beat on low and add the nuts, mixing just to blend.

Place a silicone mat on a large pan. Lightly dust it with cornstarch and pour the hot nougat on top. Dust the top of the nougat with cornstarch and place another silicone mat on top of it. Roll the nougat to 1.3 cm (1/2-inch) thick with rolling pin.

Allow to cool for a couple of hours and cut into 2.5 cm (1-inch) squares. Use a brush if you want to dust off the excess cornstarch and enjoy!

Thursday, July 1, 2010

Baking Bagels


During the school semester when I had to keep up with my readings, assignments and constantly study for tests, I longed for summer holidays. I even dropped the summer class I had intended to take to have a stress-free vacation and to be able to enjoy the good weather.

But I've been having a little bit of trouble occupying my time these past few weeks. I started a puzzle which ended up being too long and lost patience pretty quickly. I never miss the opportunity to tan in my backyard when the weather is sunny and warm, even if the view isn't comparable to the one we had last year on our trip to Greece.


This time 2009, a couple of friends and I were exploring the beautiful island of Mykonos located in the Aegan Sea. Mykonos is known as the party island of Greece so its streets are filled with tourists at any time of the day. Ahh Mykonos..


So when not working or playing that ridiculously addictive game Zuma, I'm in the kitchen making yet another ice cream from The Perfect Scoop. This time, I wanted to try something different. I was craving something simple, something savory. I have a huge sweet tooth but I can never resist bread and cheese. I can go on eating that for days!

I've never ever baked anything with yeast before. Sure I've helped my boyfriend, V, bake all sorts of breads (his ciabatta and sour dough are my favorite) and we have made some really good bagels. He uses The Bread Baker's Apprentice like I use my copy of The Perfect Scoop! So when I got that sudden urge to bake bagels, I was going straight for that recipe, except I didn't have any bread flour! Then I rememebered that lovely post Elissa had made on 17 And Baking. There was no bread flour used and her homemade bagels looked perfect!


My bagels might not have turned out as perfect as Elissa's (V told me to knead more to get a smoothe dough... they look a little deformed...), but they sure were delicious!

Monday, June 28, 2010

Almond Biscotti


I just love biscottis. Crunchy, crispy and not overly sweet. I added some cinnamon too and voilà: a perfect treat next to my frappe!

Wednesday, June 23, 2010

Blueberry Macarons

Everytime I'm in the Mont Royal area downtown, I make sure I stop either by La Maison du Macaron or the newly discovered Point G. I've tried many of their flavors and now believe that there isn't one macaron that tastes bad. Even the weird ones like Balsamic Vinegar are delicious!


Seeing that I've been having more of these petits four lately, I decided to give them another shot. I had used the french method last time and had some trouble with the batter that had ended up far too liquidy to pipe out. This time, I chose to use the italian method which was said to be easier to work with for beginners.


I followed the detailed instructions and tips on Mélanger (the italian method follows the french) and found the batter much easier to pipe out! They didn't turn out flat like with the french method! Nice!


However, there are some things I would do differently next time. I would double my pans when baking because my first batch burnt slightly. I would fold the batter a bit more after adding the egg white + almond mixture to the meringue to get rid of all the lumps. Also I couldn't find egg white powder anywhere, so I had to omit it. I wonder what that would change...


The recipe for these blueberry macarons can be found on Mélanger's blog! I suggest to let the filling in the fridge for a couple of hours so it can be really thick when filling the macarons. Absolutely delicious!

Saturday, June 19, 2010

Ice Cream Madness (Part II)!!

I avoided this (Unsalted) Butter Caramel Ice Cream because I am really bad at making caramel. I usually burn it on my first try, then undercaramelize it on my second attempt because I'm afraid to burn it again. This week, I was somehow feeling more confident in the ice cream-making department, so I decided to give it a try! This recipe isn't in The Perfect Scoop but I found it on David Lebovitz's blog. Even if I was really careful when making the caramel, I still burnt it the first time. I just kept telling myself "a little longer, a little longer..." for the color to turn amber but what I forgot is that when I take off the saucepan from the stove, the caramel keeps cooking since the pot is still hot, causing it to burn. I think I'll start using a thermometer from now on.

There's no doubt that this ice cream is out of this world! I really had to stop myself from eating the whole thing! It reminded me of those individually wrapped salted caramels you can find at candy stores. I didn't have salted butter so I used unsalted instead but still added the fleur de sel as mentioned in the recipe. The caramel bits didn't melt and become gooey after letting the ice cream freeze, but this ice cream is still one of my favorite!


I find peanut butter really good though I prefer having raspberry or apricot jam on my toast. But my sister has this thing with peanut butter. The only way she eats it is with a spoon directly from the container. She is the biggest peanut butter fan I know so I immediately thought of her when I saw this Chocolate-Peanut Butter Ice Cream with Fudge Ripple in The Perfect Scoop.

I followed this recipe to the letter and it didn't double up in size after churning like all the other ice creams I've made so far. Maybe it's because there are no eggs? I had made some peanut butter patties from the Mix-ins section of the book, but the ice cream had a stronger peanut butter flavor than I had imagined so I left them out. The fudge ripple is a must though! I recommend this ice cream to all the peanut butter fans out there!


**********

Chocolate-Peanut Butter Ice Cream
Adapted from The Perfect Scoop by David Lebovitz
Makes 1 Quart

2 cups half-and-half (I can't find this in Montreal so I used half whole milk and half heavy cream)
1/4 cup unsweetened Dutch-process cocoa powder
1/2 cup sugar
Pinch of salt
1/2 cup smooth peanut butter

Whisk together half-and-half, cocoa powder, sugar, and salt in a large saucepan. Heat and whisk frequently until the mixture comes to a boil (it will foam up). Remove from heat, whisk in peanut butter and stir until completely blended.

Chill the mixture overnight and freeze it in your ice cream maker.


Fudge Ripple
Adapted from The Perfect Scoop by David Lebovitz
Makes 1 cup

1/2 cup sugar
1/3 cup light corn syrup
1/2 cup water
6 tbsp unsweetened Dutch-process cocoa powder
1/2 tsp vanilla extract

Whisk sugar, corn syrup, water and cocoa powder together in a medium saucepan. While whisking constantly, heat over medium heat until there are bubbles at the edge of the mixture.

Continue whisking until the mixture comes to a low boil and then cook for another minute (keep whisking). Remove from heat, stir in the vanilla extract and let it cool completely before chilling it in the fridge overnight.

Layer spoonfuls of the fudge ripple between layers of the just-churned ice cream.

Friday, June 11, 2010

Ice Cream Madness!!

I am really obsessed with The Perfect Scoop at this point! I think I can call it my favorite book (it has almost exceeded the Twilight series!!). If you don't own this book and love ice cream, check it out asap!

When I used to bake more, I always needed butter. Now I always need heavy cream. Lots and lots of heavy cream. I've been making half of David Lebovitz's recipes so when dividing the 5 egg yolks called for in most of the ingredients, I decided to use 3 instead of 2 1/2. I find this has made my ice creams softer and creamier... even better!

I was attracted to this Green Tea Ice Cream mainly because I love green tea latte but also because of its vivid green color. To make this ice cream, you follow the custard base recipe and all you do is whisk in 4 tsp matcha powder to the heavy cream before you pour in the custard through a strainer. My ice cream didn't have the vivid green color as shown in the book... maybe I should've bought a higher quality matcha powder? It did taste just like green tea latte though!


Mint and chocolate ice cream is my favorite flavor. I just love that combination. Give me After Eight, Pep or Mint Aero and you'll be my best friend. I'm so used to the mint extract flavor though that when I tasted the Fresh Mint Chip Ice Cream, I was a bit disappointed. Don't get me wrong, it's delicious (we finished it in 2 days), but it tastes very different from the ones we buy at the supermarket. If you're looking for something like that, I suggest you use mint extract instead.


After making my favorite, I decided to make my sister's: Raspberry Swirl Ice Cream. This ice cream is also very easy to make. You simply make a vanilla custard base ice cream and then layer it with the raspberry swirl (raspberries, sugar and 1 tbsp of vodka). This ice cream also vanished in a matter of days but for next time, I would try to find a raspberry swirl that doesn't freeze, kind of like a syrup.


This summer, I've been visiting our local ice cream shop La Paysanne pretty often (even if I've been making a considerable amount of ice cream recently). Instead of gelato, I've been going for sorbets which I find are so refreshing in hot weather. My favorite until now are lemon, lime and raspberry. I had some frozen raspberries in the freezer so I decided to make Raspberry Sherbet which consists of whole milk, sugar, raspberries and a bit of lemon juice. It tasted exactly like the raspberry sorbet I've been having at La Paysanne but a bit creamier. Yum!

Thursday, June 3, 2010

Chocolate Chip Zucchini Muffins


I don't know why I put off making these muffins. First, I should tell you that these are the zucchini cupcakes from Martha Stewart's Cupcakes book. They are usually frosted with cream cheese frosting, but I decided to make them without the frosting and add chocolate chips instead. These muffins are really easy to make, and you don't even have to take out the mixer!

I've been avoiding Martha Stewart's books mostly because the last few time I've been following her recipes, they hadn't turned out well. But I can definitely tell you now that these muffins have turned things around!


At this point of the batter preparation, it felt like Christmas in our kitchen. The mixture of cinnamon, nutmeg and cloves brought back sweet memories of warm gingerbread cookies!


Once I took the muffins out of the oven, I was so relieved they hadn't overflowed because I was debating if I should fill them over the usual three-quarters-full suggestion. I had halved the recipe down to 12 muffins but go ahead and make all 24 cause they go by fast!!


**********

Chocolate Chip Zucchini Muffins
Makes 24 muffins

3 cups all-purpose flour
1 tsp baking soda
1/2 tsp baking powder
1 tsp salt
2 tsp ground cinnamon
1/2 tsp nutmeg
1/4 tsp ground cloves
1 cup vegetable oil
2 large eggs, at room temperature
1 tbsp vanilla extract
3/4 tsp grated lemon zest
2 cups sugar (original recipe had packed brown sugar but I was out!)
3 cups packed grated zucchini
1 cup semisweet chocolate chips (optional)

Preheat oven to 350 degrees F and line muffin tins with paper liners.

Whisk together flour, baking soda, baking powder, salt, cinnamon, nutmeg and cloves. In another bowl, whisk together oil, eggs, vanilla and lemon zest until well blended. Whisk in brown sugar until smooth. Stir in zucchini and then add flour mixture and stir until just combined. Stir in chocolate chips.

Divide the batter evenly into muffin tins. Bake for 20 minutes or until inserted toothpick comes out clean. Transfer muffins on a wire rack to cool.