Monday, January 31, 2011

Marshmallows and Ski


I really regret not enjoying winter as much as I should. Instead of hanging out indoors, watching movies and going for coffee, I should be out there skating, snowshoeing and skiing! Quebec is the perfect place for outdoor sports!

Mont St-Anne, Québec

This is the second year we go on the ski trip organized by Concordia University. Last year was my first time skiing, so I had to take beginner lessons. This year was a bit easier, I remembered the pointe de pizza and that I had to do big S's down the slope, not go down in a straight line... But the reason we enjoy this trip is because we are with friends, hang out in our chalets, have delicious dinners and all get together at night.


If you've never made marshmallows before, this is the best time! Not only can you enjoy them in a warm cup of hot chocolate, you can roast them over a fire or even make S'mores! Make the traditional white ones (vanilla) but also try making some yummy chocolate (I highly suggest) or raspberry ones! Whatever you do, they will taste 10X better than store-bought marshmallows and everyone will be like: "You can make marshmallows? How?"

Here's the recipe by Dorie Greenspan from Baking: From My Home to Yours. Try it out, it's not as hard as it seems!


Tuesday, January 25, 2011

Tiramisu Cake


This is the perfect cake to make for a celebration. It is easy to make, not very time-consuming and tastes wonderful! It will take longer if you make your ladyfingers, I decided to try it out with store-bought Savoiardi cookies. We made this for my boyfriend's mother's birthday and everyone loved it! I would make a bigger one next time I think, maybe a 9-inch cake, because it disappeared quickly!

**********

Tiramisu Cake
Adapted from Happy Home Baking
Makes one 7-inch cake

For the espresso syrup:

1 tbsp instant espresso/coffee powder
1/2 tbsp sugar
1/2 cup boiling water
1 tbsp Kahlua (or Marsala)

Dissolve the instant espresso/coffee powder and sugar in the boiling water. Let it cool and stir in the Kahlua. Set aside.

For the filling:

250 g marscapone cheese
1-1/2 tsp vanilla extract
3 tbsp icing sugar
2 tbsp Kahlua (or Marsala)
1 cup heavy whipping cream

In a mixing bowl, whisk marscapone, icing sugar, vanilla extract, Kahlua and 3 tbsp of the espresso syrup with a manual whisk until blended.

With an electric mixer, whisk the whipping cream until soft peaks form and fold 1/4 of it in the marscapone mixture with a spatula. Fold the remaining whipped cream in the marscapone mixture gently.

To assemble the cake:

About 24 ladyfingers (Savoiardi)
Dark and white chocolate shavings
Cocoa powder, to dust
Espresso syrup (above)
Filling (above)

Line the edges of a 7-inch spring form pan (remove the base) with plastic wrap and place it on a plate or a round cardboard base. Cut off one end of the ladyfingers so each is about 3 inches in length. Line the sides of the pan with the ladyfingers (about 17) and save the leftover small pieces.

Gently dip ladyfingers one at a time in the espresso syrup and use them to line the base of the pan, soaked side up. Cut the ladyfingers into shorter lengths if necessary and use the leftovers pieces to fill in the gaps.

Spoon over half of the filling and spread it evenly over the first layer of ladyfingers. Grate some dark chocolate over the filling. Repeat with another layer of ladyfingers and spoon over the remaining filling. Spread and smooth the top. Dust with cocoa powder and grate some more dark and white chocolate over the top. Cover with plastic wrap and refrigerate for at least 4 hours, best left overnight.

Before serving, unmold the cake and tie a ribbon around the outer ladyfingers.

Monday, January 17, 2011

Macarons au café - Coffee Macarons


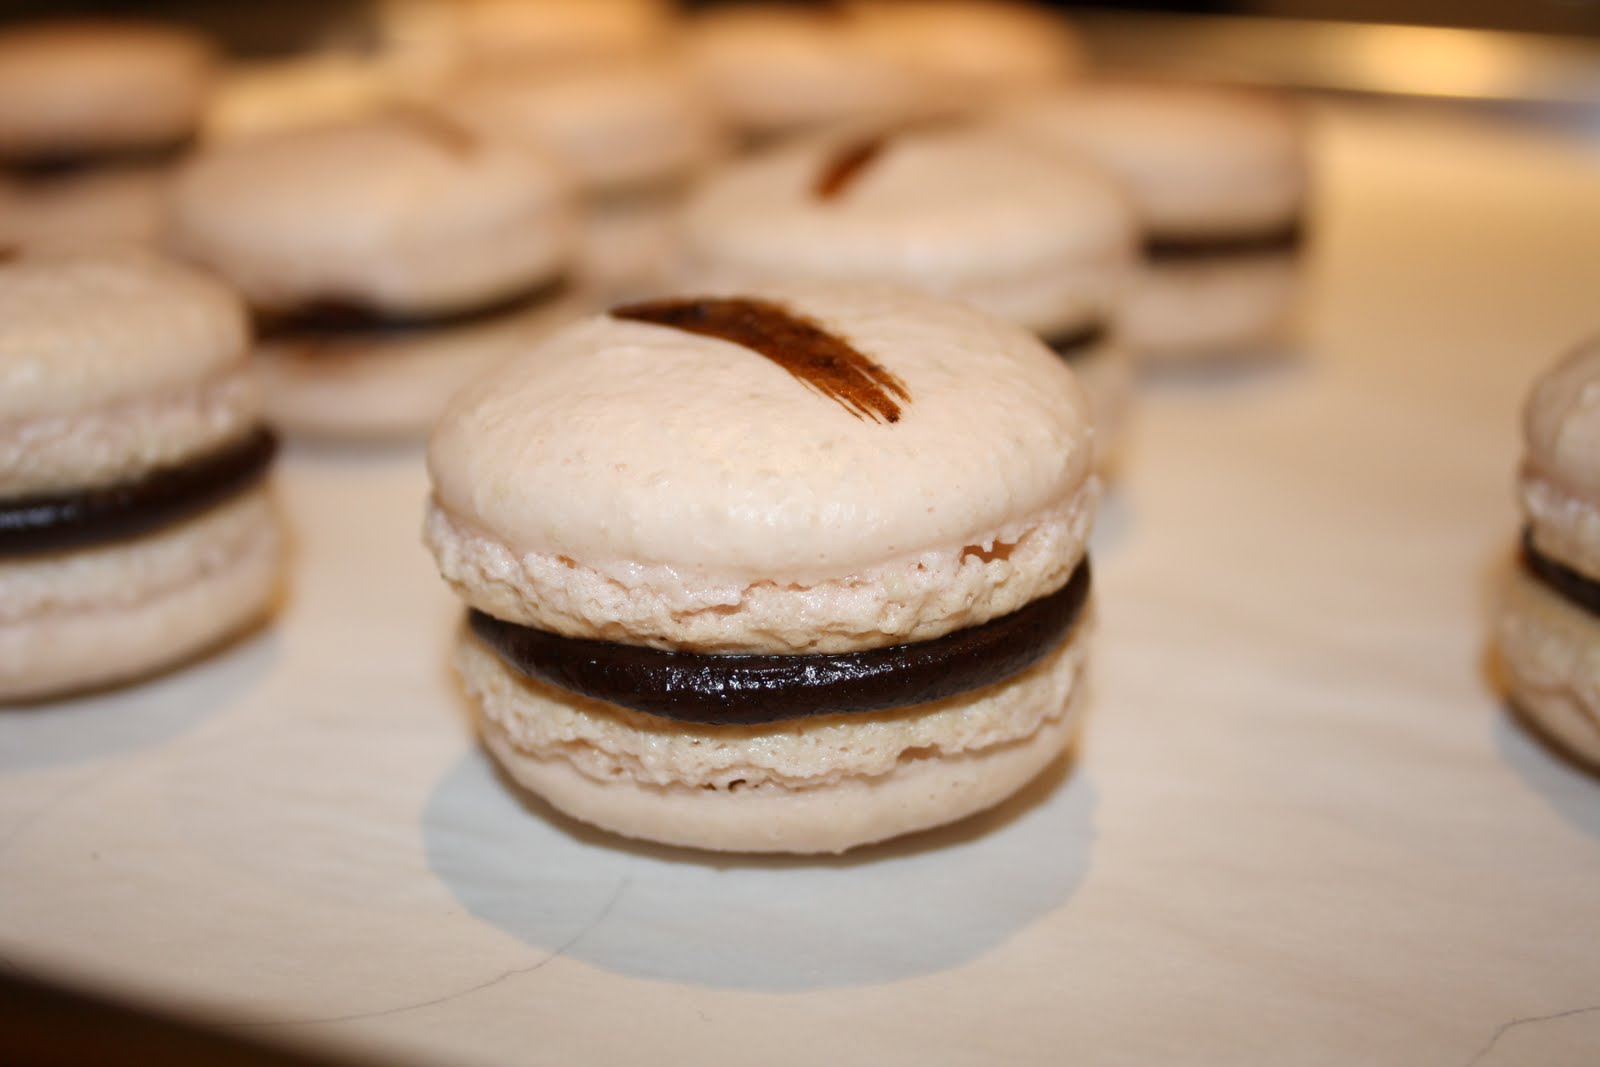
Last year I had visited a macaron shop in the downtown area of Montreal and wrote a post about it! The owners of that shop have written a book with all the recipes of the macarons they sell there and guess what? I got it for Christmas! It is such a beautiful book! I will attempt to make my favorite macaron one day, caramel fleur de sel.


This week, I made my first macaron from that book, Macarons au café (or Coffee Macarons) following the Italian meringue method. The recipes are planned out for you, dividing the tasks to make each macaron in days. For these, Jour 1 consisted of making the chocolate-espresso ganache and Jour 2 consisted of making the shells and assembling them. They turned out a success, even if I used dark chocolate instead of milk for the ganache! I only think that I should have ground the almond powder more because my macaron shells turned out looking a bit grainy. I'll be doing that next time one day or two before and letting it dry. I can't wait to try making more! Here is their in-store catalogue!


Saturday, January 15, 2011

Sundae Cupcakes


I'm finally posting the cupcakes I made for Cupcake Camp 2010 a few months ago. Aren't they pretty? I chose to make sundae cupcakes since I love making ice cream so much! I'm really looking forward to participate in the competition next year!

I used the devil's food cake recipe from David Lebovitz and the vanilla buttercream recipe below for the cupcakes. I made the Classic Hot Fudge from The Perfect Scoop and drizzled it on top of the frosted cupcakes after it had cooled a bit. Decorate with sprinkles and maraschino cherries!

**********

Sundae Cupcakes
Makes about 48 frosted cupcakes

Chocolate Cupcakes
Adapted from Annie's Eats, originally from David Lebovitz

18 tbsp unsweetened cocoa powder
3 cups cake flour
1 tsp salt
2 tsp baking soda
1/2 tsp baking powder
16 tbsp unsalted butter, at room temperature
3 cups granulated sugar
4 large eggs, at room temperature
1 cup strong coffee (or water)
1 cup whole or low-fat milk

Preheat oven to 350 degrees F. Line 4 cupcake pans with papers liners. In a medium bowl, sift together the cocoa powder, cake flour, salt, baking soda and baking powder. In the bowl of a standing mixer fitted with paddle attachment, cream the butter and sugar on medium-high speed until light and fluffy, about 5 minutes. Mix in the eggs one at a time, scraping down the sides of the bowl between additions.

In a large measuring cup, combine the coffee and milk. Add half of the dry ingredients to the mixer and mix on low speed just until incorporated. Stir in the coffee-milk mixture and mix until combined. Add in the remaining dry ingredients, again mixing until just incorporated. Divide the batter evenly between the cupcake liners, filling the cups not more than 3/4 full. Bake for 20 minutes, or until a toothpick inserted in the center comes out clean. Transfer to wire rack to cool completely.

Vanilla Buttercream
Adapted from Milk and Honey Cafe

1-1/2 cups (3 sticks) unsalted butter, softened
3-4 cups confectioners' sugar, sifted
1 tsp vanilla extract
2 tbsp heavy cream

In a stand mixer fitted with a whisk attachment, beat the butter at medium-high speed until smooth, for about 20 seconds. Add half the confectioners' sugar, beat at medium-low speed until most of the sugar is moistened, about 45 seconds. Scrape down the bowl and beat at medium-high speed until mixture is fully combined, about 15 seconds. Add the rest of the confectioners' sugar and mix again. Scrape the bowl, add the vanilla extract and heavy cream, and beat at medium-high speed until incorporated, about 10 seconds. Then increase the speed to medium-high and beat until light and fluffy, about 5 minutes, scraping down the bowl once or twice. Add more confectioners' sugar if you find your frosting isn't thick enough, or more heavy cream if you find it too thick.

Tuesday, January 11, 2011

Burnt Sugar Ice Cream


I have now realized that I cannot follow cooking groups. I feel really guilty calling myself a French Fridays with Dorie member since I participated for only the first two weeks! It's hard for me to make something that is chosen for me, especially when it involves cooking and not baking.

The good thing about cooking/baking groups is that you get to see everyone else's results who followed the recipes from the books. I had read a lot of good reviews about Dorie's Burnt Sugar ice cream from her book Baking: From My Home to Yours, so I had no doubt that this was going to be a successful one!

**********

Burnt Sugar Ice Cream
Adapted from Baking: From My Home to Yours by Dorie Greenspan
Makes about 1-1/2 pints

1 cup sugar
3 tbsp water
2 cups whole milk
1 cup heavy cream
4 large egg yolks
Pinch of salt
1-1/2 tsp pure vanilla extract

Stir the sugar and water together in a medium heavy-bottomed saucepan. Place the pan over medium-low heat and cook until the sugar dissolves. Increase the heat and boil, without stirring, until the syrup turns a deep amber color (be careful not to burn it!). Swirl the saucepan from time to time.

Lower the heat and add the milk and cream. Everything will bubble and seethe and the mixture will have some hardened caramel. Keep stirring and it will calm down and smooth. When the mixture is completely smooth, remove the pan from the heat.

In a medium heatproof bowl, whisk the egg yolks and salt together until slightly thickened. Still whisking (and never stop) drizzle some hot liquid inside slowly to temper (or warm) the yolks. Keep whisking and slowly pour the remaining hot liquid into the yolks. Pour the custard back into the saucepan and cook over medium heat, stirring with a wooden spoon until the custard thickens and reaches between 170 and 180 degrees F on a thermometer. Remove the pan from the heat and strain into a clean heatproof bowl. Stir in the vanilla extract and cool over an ice bath.

Refrigerate the custard overnight (or until chilled, the more the better) and churn it in ice cream machine according to manufacturer's directions.

Wednesday, January 5, 2011

Salmon Mousse Appetizers

For this New Year's dinner, I unfortunately didn't get the chance to make any of the deserts I was planning to and looked for something rather quick.


My parents always buy smoked salmon but I prefer it on a bagel with cream cheese and believe it or not, I found this recipe on Annie's Eats where you make a mousse using cream cheese. You can use it as a spread or make it look a bit fancier by piping it onto crackers (I used rosemary ones). Next time I think I'll pipe it onto sliced cucumbers instead!


**********

Salmon Mousse
Adapted from Annie's Eats
Makes about 25-30 appetizers

8 oz. smoked salmon, flaked with a fork
8 oz. cream cheese, softened
1 tsp fresh dill, finely chopped
Freshly ground black pepper, to taste
1 clove garlic, finely minced
Splash of lemon juice
25-30 crackers

Combine all the ingredients in the bowl of a food processor. Pulse repeatedly until all the ingredients are blended and the mixture is smooth. Taste and add more cream cheese, fresh dill or lemon juice if you like, depending on your taste. Pipe or spread onto crackers and garnish with fresh dill.

Friday, December 31, 2010

Homemade Ferrero Rocher

I looove Ferrero Rocher truffles! Since I saw the recipe for homemade ones on Blue-Eyed Bakers, they've been on my ever-growing to do/bake list.


They don't taste exactly like Ferrero Rocher but they still are delicious! Next time I would put a toasted hazelnut in the centre of each truffle and would just make them a bit smaller. If you love the combination of hazelnut and chocolate (and Nutella!) you should definitely give these a try!

Oh and I almost forgot! Happy New Year!!! See you in 2011!

**********

Ferrero Rocher Truffles
Adapted from Blue-Eyed Bakers
Makes about 16-18 truffles

100 g hazelnut wafer biscuits, crushed
1 cup hazelnuts
2/3 cup Nutella
1-1/2 cup semisweet chocolate chips

Preheat oven to 350 degrees F. Spread the hazelnuts on a baking sheet and toast them for 8 to 10 minutes. Let the hazelnuts cool and remove the skins by rubbing them with a paper towel. Place them in a food processor and grind until they are finely chopped. In a bowl, add the crushed wafer biscuits, chopped hazelnuts and Nutella, and stir to combine. Refrigerate the mixture for about 20 minutes.

Onto a baking sheet lined with parchement paper, use a small scooper to scoop little balls of the cooled mixture. Put the baking sheet in the freezer for 15 minutes. Remove the baking sheet from the freezer and shape the balls with your hands to make round smoothe balls. Place the baking sheet in the freezer for another 20 minutes.

Meanwhile, fill a medium-sized saucepan halfway with water and heat until the water simmers. Place a heatproof bowl on top of the saucepan with water and place the semisweet chocolate chips in the bowl. Stir until the chocolate has completely melted and turn the heat to very low. Coat the chilled truffles in the chocolate and place them on a banking sheet lined with parchement paper. Allow chocolate to set at room temperature for an hour. Truffles can be stored in an airtight container at room temperature for up to a week.

If you have some melted chocolate left you can use it to dip 0ther things you have home. I dipped pretzels and pieces of clementine!


Monday, December 27, 2010

Panettone


Merry Christmas everyone!!

This year, I decided not to make gingerbread men like I always do and try something different. My boyfriend really loves panettone, especially the chocolate chip one, so I tried making orange chocolate chip panettone! And to tell you the truth, I don't really consider what I made panettone, since it's supposed to be sort of fluffy and light on the inside and mine turned out a bit dense. Kind of like a cake :(

I'm still posting the recipe in case any of you want to give it a try. I made a few changes since I didn't want to add dried fruit. But I'm sure I did something wrong mainly because after the 15 hours of rising, my dough hadn't rised! I searched online to see what can be the cause and there were a few alternatives:

1) The yeast is dead (or expired).

2) Proofing is done in a cool place.

3) The dough wasn't kneeded enough.

I thought maybe my oven was too cool for the rising, so I preheated it a bit, let it cool and placed the dough inside for another 5 hours (first rising). It did rise a bit, but not even close to triple the size. I still decided to continue with the recipe and bake it to see the ending result. It wasn't bad at all, just not a panettone!

**********

Slow Rise Panettone
Adapted from Andreas Recipes (Gourmet Magazine 2008)
Makes one 6x4-inch panettone

3-3/4 cups all purpose flour
2/3 cup sugar
1/2 tsp salt
1/2 tsp active dry yeast
Zest of one orange
1/2 vanilla bean, split lengthwise
3 large eggs, at room temperature
2/3 cup lukewarm water
1 tbsp warm honey
12-1/2 tbsp unsalted butter (10-1/2 tbsp softened and cut into tbsp, 1 tbsp melted, 1 tbsp chilled)
3/4 cup mini semisweet chocolate chips

6x4-inch panettone mold

In the bowl of a mixer, combine flour, sugar, salt, yeast, orange zest and seeds of the vanilla bean and mix at low speed. In a small bowl, whisk together the eggs, 2/3 cup lukewarm water and the honey.

While the mixer runs at low speed, pour the egg mixture into the dry ingredients slowly. Increase speed to medium-high and continue mixing. Add the softened butter, 1 tbsp at a time, mixing completely after adding each tbsp. Increase speed to medium-high and mix until the dough is smoothe and elastic, about 8 minutes.

Melt the 1 tbsp of butter, let it cool and mix it into the mini chocolate chips. Stir the chocolate into the dough with a wooden spoon.

Place the dough in a large bowl, cover it with plastic wrap and let it rise in a cold oven with the door closed for about 12 to 15 hours, until the dough has nearly tripled in volume.

Rub your hands with flour, sprinkle the dough lightly with flour and turn it onto a floured board. Sprinkle a little more flour onto the dough. Fold the edges into the centre and place seams side down into the panettone mold. Cover with a damp tea towel and let it rise in a draft-free spot at room temperature for about 3 to 5 hours, until the dough is just above the top of the mold.


Place the rack in the lower third of the oven (closer to the bottom than the top) and preheat it to 370 degrees F. Place the mold with the dough onto a baking sheet. Use a serrated knife to score an X across the entire surface of the dough and place the 1 tbsp chilled butter into the centre of the X.

Bake for about 1 to 1-1/4 hours, until a wooden skewer inserted in the middle of the panettone comes out moist but not wet. The top of the panettone will be dark (but not burnt). (I covered it with foil paper after 1 hour in the oven so the top won't burn.)


Pierce the skewers all the way through the panettone and through the papers. (This part I found weird!) Hang the panettone upside down over a large pot or between 2 objects of equal height. Cool completely, then slice into wedges for serving.

Wednesday, December 22, 2010

Cupcakes for a Celebration!

My boyfriend's niece was baptized a few weeks ago and her mother had asked me to make some cupcakes for the reception. Me? Make cupcakes for a baptism? I was so honoured!!

She wanted vanilla cake with three types of icing. After a few hours of searching blogs and a bit of brainstorming I came up with these three:

Vanilla bean buttercream with heart-shaped fondant cutouts (S for Sofia)


Chocolate buttercream topped with purple flowers


You can click on the links under the photos to be directed to the recipes! I didn't follow all the buttercream recipes to the letter. When I made the strawberry one, I found that the strawberry purée didn't give the frosting a strong taste so I added some strawberry flavour. For the chocolate and vanilla bean, I added more milk or powdered sugar until I got the consistency I wanted.

Sofia and her family really loved the cupcakes. Ok maybe not Sofia, she still only has milk! But I have to admit my favorite was the one with chocolate buttercream!

Monday, December 13, 2010

Candycane Ice Cream


December: the best month for baking. And how better to start the holiday baking than with another ice cream? I am obsessed, I know. I don't really like flavoring ice creams with extract, but since I found this Candycane ice cream on Simply Recipes inspired by David Lebovitz, I had to give it a try!

It is simply a vanilla ice cream (a little different from how David Lebovitz makes it in his book but also very good) in which peppermint extract is added, and crushed candycanes as well in the last minute of churning. I also added two drops of pink food coloring to get a pink color. A perfect way to welcome Christmastime :)

Here is the recipe!